前言
这一lesson,主要是介绍如何获取CoreData保存的数据,和如何利用CoreData保存数据。
本Lesson的目的
本课程目的和实现步骤:
利用CoreData获取已保存的对象
1.从Context获取已经存取的对象(NSManagedObject)Actors
利用CoreData保存对象
2.将Actors加入到Context3.保存Context里的Object
从上面步骤可以看出获取和存取都需要用到Context,下面就稍微解释一下Context是什么呢?
如下图:
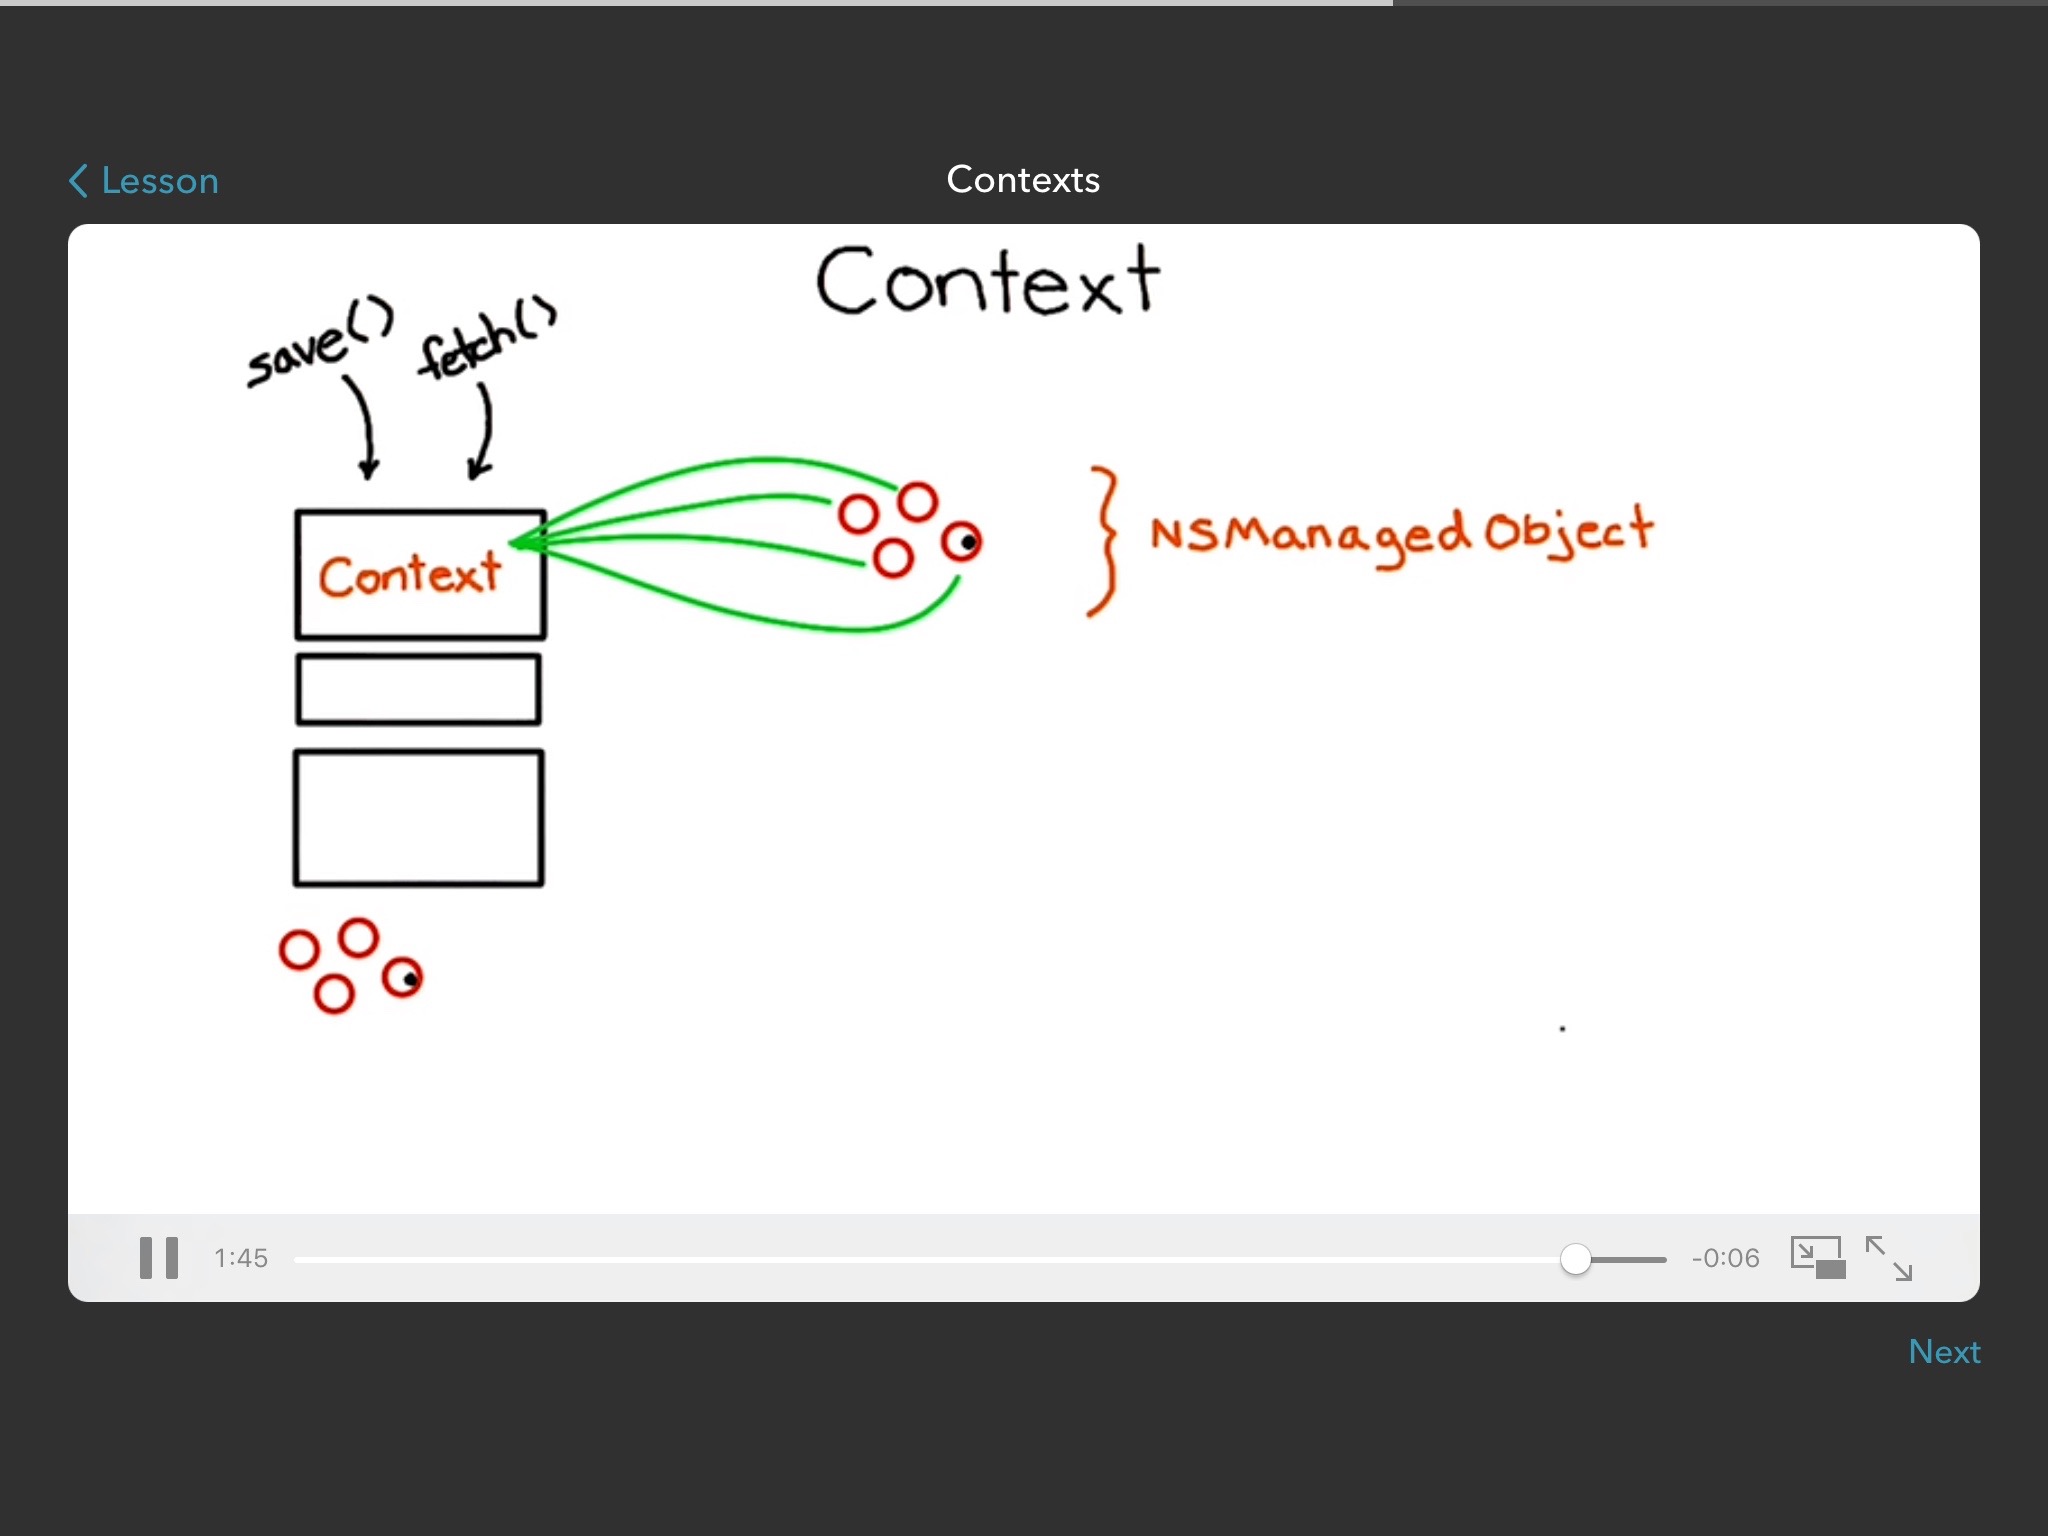
图中的将要保存的object通过继承NSManagedObject来使自己和Context有联系。
在CoreData Stack里面的最上层有个Context是用来与NSManagedObject交互。作用是:获取CoreDate保存的NSManagedObject和保存NSManagedObject。而获取NSManagedObject(对象)的fetch()和保存NSManagedObject(对象)的save()都是针对Context使用的.
所以Context很重要,下一课程才教导如何制造这个CoreData Stack和Context。这一章节是教如何跟Context打交道来获取或者保存我们想要的Object。
接下来,首先从如何利用CoreData获取已保存的对象开始。开始。
从Context获取已经存取的对象
需要三步:
1.获取Context。2.设置参数NSFetchRequest3.执行
executeFetchRequest(_ request: NSFetchRequest)method
执行以上步骤就能从Context获取已经存取的对象。
1.获取Context
那么首先从获取Context开始
由于本课程的Context是存放在AppDelegate中的,所以代码如:
// Try to get a reference to the context
var sharedContext: NSManagedObjectContext{
    let appDelegate = UIApplication.sharedApplication().delegate as! AppDelegate
    return appDelegate.managedObjectContext
}
2.设置参数NSFetchRequest
然后通过Context里的executeFetchRequest(_ request: NSFetchRequst)method来获取保存对象Actors。
但是要想使用executeFetchRequest(_ request: NSFetchRequest)则需要传递NSFetchRequest类的参数。那么就通过以下代码制作这个参数:
//其中的entityName默认是和保存的那个类同名的。所以这里就是获取Person类的Object
let fetchRequest = NSFetchRequest(entityName: "Person")
3.执行method
既然设置好了参数,那么现在就可以将fetchRequest传入executeFetchRequest(_ request: NSFetchRequest)获取整个数组, 结合上面的代码,完整的获取代码如下:
func fetchAllActors() -> [Person] {
        // Create the fetch request
        let fetchRequest = NSFetchRequest(entityName: "Person")
        // Execute the Fetch Request
        do {
            //上面代码的compute propertity
            shareContext
            return try sharedContext.executeFetchRequest(fetchRequest) as! [Person]
        } catch let error as NSError {
            print("Error in fetchAllActors(): \(error)")
            return [Person]()
        }
    }
能够取出Object了,那么接下来就是开始了解怎么利用CoreData保存对象
利用CoreData保存对象
要做以下两个步骤:
1.将Actors加入到Context(Actors 是数组[Person])2.保存Context里的Object
先来将Actors加入Context,为了将Actors加入到Context。需用到Person继承自NSManagedObject的initmethod,这method接收entity和Context作为参数.
在下一章节才介绍如何改写这个Person。这一章节就只需知道如何使用Person(dictionary:,context:)将Person插入到Context然后保存Context里的Object则需要利用Context的save()method整合起来利用CoreData保存Object的代码如下:
// Insert the actor on the main thread
dispatch_async(dispatch_get_main_queue()) {
    // Init the Person, using the shared Context
    let actorToBeAdded = Person(dictionary: dictionary, context: self.sharedContext)
    // Append the actor to the array
    self.actors.append(actorToBeAdded)
    do {
        try self.sharedContext.save()
    } catch let error as NSError  {
        print("Error saving context: \(error.localizedDescription)")
    }
}
因为Context创建的时候是与某一线程相关的。下一章节剖析里面结构的时候就可以发现当中的是与main_queue联系的。所以上面使用Context的时候就需要在main_quque执行代码。
这一章节重在使用CoreData,下一章节将会教如何构建CoreData
附加内容:
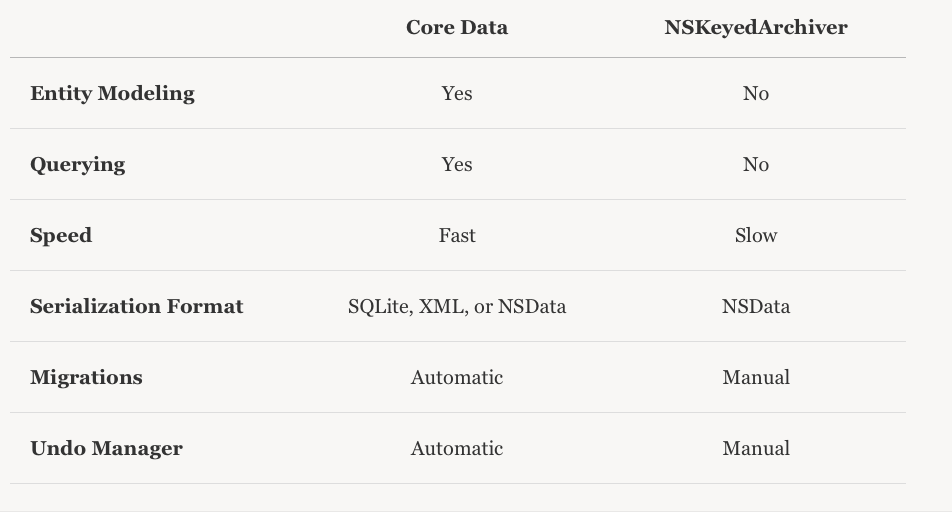
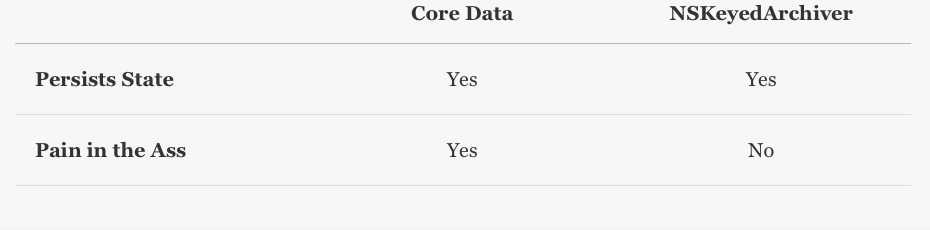
与NSCoding/NSKeyArchiver 的对比
NSCoding/NSKeyArchiver 相对CoreData来说使用起来,没有这么扯蛋。但是CoreData比较多特性点。