Core Data from Scratch
本Lesson 4是介绍如何配置CoreData供Lesson 3使用的。
配置CoreData的步骤如下:
1.加入Core Data Stack
2.加入Core Data Model
3.使Object继承NSManagedObject
从第一步开始,加入Core Data Stack
Core Data Stack
其实Core Data的配置基本一样的,所以可以直接创建一个file然后粘贴下面的代码就可以了。先上代码,然后再解释:
import Foundation
import CoreData
/**
 * The CoreDataStackManager contains the code that was previously living in the
 * AppDelegate in Lesson 3. Apple puts the code in the AppDelegate in many of their
 * Xcode templates. But they put it in a convenience class like this in sample code
 * like the "Earthquakes" project.
 *
 */
private let SQLITE_FILE_NAME = "FavoriteActors.sqlite"
class CoreDataStackManager {
    // MARK: - Shared Instance
    /**
     *  This class variable provides an easy way to get access
     *  to a shared instance of the CoreDataStackManager class.
     * 说白了,就是单例模式
     */
    class func sharedInstance() -> CoreDataStackManager {
        struct Static {
            static let instance = CoreDataStackManager()
        }
        return Static.instance
    }
    //存取file的目录路径
    lazy var applicationDocumentsDirectory: NSURL = {
        print("Instantiating the applicationDocumentsDirectory property")
        let urls = NSFileManager.defaultManager().URLsForDirectory(.DocumentDirectory, inDomains: .UserDomainMask)
        return urls[urls.count-1]
    }()
    //加载和配置Core Data Model
    lazy var managedObjectModel: NSManagedObjectModel = {
        // The managed object model for the application. This property is not optional. It is a fatal error for the application not to be able to find and load its model.
        print("Instantiating the managedObjectModel property")
        let modelURL = NSBundle.mainBundle().URLForResource("Model", withExtension: "momd")!
        return NSManagedObjectModel(contentsOfURL: modelURL)!
    }()
    /**
     * The Persistent Store Coordinator is an object that the Context uses to interact with the underlying file system. Usually
     * the persistent store coordinator object uses an SQLite database file to save the managed objects. But it is possible to
     * configure it to use XML or other formats.
     *
     * Typically you will construct your persistent store manager exactly like this. It needs two pieces of information in order
     * to be set up:
     *
     * - The path to the sqlite file that will be used. Usually in the documents directory
     * - A configured Managed Object Model. See the next property for details.
     */
    /* 说白了,这个变量是用来file system交互的,它需要两个参数:
    * 1.就是sqlite的文件路径
    * 2.已经配置好的Managed Object Model
    */
    lazy var persistentStoreCoordinator: NSPersistentStoreCoordinator? = {
        // The persistent store coordinator for the application. This implementation creates and return a coordinator, having added the store for the application to it. This property is optional since there are legitimate error conditions that could cause the creation of the store to fail.
        // Create the coordinator and store
        print("Instantiating the persistentStoreCoordinator property")
        let coordinator: NSPersistentStoreCoordinator? = NSPersistentStoreCoordinator(managedObjectModel: self.managedObjectModel)
        let url = self.applicationDocumentsDirectory.URLByAppendingPathComponent(SQLITE_FILE_NAME)
        print("sqlite path: \(url.path!)")
        var failureReason = "There was an error creating or loading the application's saved data."
        do {
            try coordinator!.addPersistentStoreWithType(NSSQLiteStoreType, configuration: nil, URL: url, options: nil)
        } catch {
            // Report any error we got.
            var dict = [String: AnyObject]()
            dict[NSLocalizedDescriptionKey] = "Failed to initialize the application's saved data"
            dict[NSLocalizedFailureReasonErrorKey] = failureReason
            dict[NSUnderlyingErrorKey] = error as NSError
            let wrappedError = NSError(domain: "YOUR_ERROR_DOMAIN", code: 9999, userInfo: dict)
            // Replace this with code to handle the error appropriately.
            // abort() causes the application to generate a crash log and terminate. You should not use this function in a shipping application, although it may be useful during development.
            NSLog("Unresolved error \(wrappedError), \(wrappedError.userInfo)")
            abort()
        }
        return coordinator
    }()
    //配置Context,需要参数coordinator
    lazy var managedObjectContext: NSManagedObjectContext = {
        // Returns the managed object context for the application (which is already bound to the persistent store coordinator for the application.) This property is optional since there are legitimate error conditions that could cause the creation of the context to fail.
        let coordinator = self.persistentStoreCoordinator
        var managedObjectContext = NSManagedObjectContext(concurrencyType: .MainQueueConcurrencyType)
        managedObjectContext.persistentStoreCoordinator = coordinator
        return managedObjectContext
        }()
    // MARK: - Core Data Saving support
    func saveContext () {
        if managedObjectContext.hasChanges {
            do {
                try managedObjectContext.save()
            } catch {
                // Replace this implementation with code to handle the error appropriately.
                // abort() causes the application to generate a crash log and terminate. You should not use this function in a shipping application, although it may be useful during development.
                let nserror = error as NSError
                NSLog("Unresolved error \(nserror), \(nserror.userInfo)")
                abort()
            }
        }
    }
}
上面代码,我加了一些Comment入去,方便理解。
整个Core Data Stack 如图:
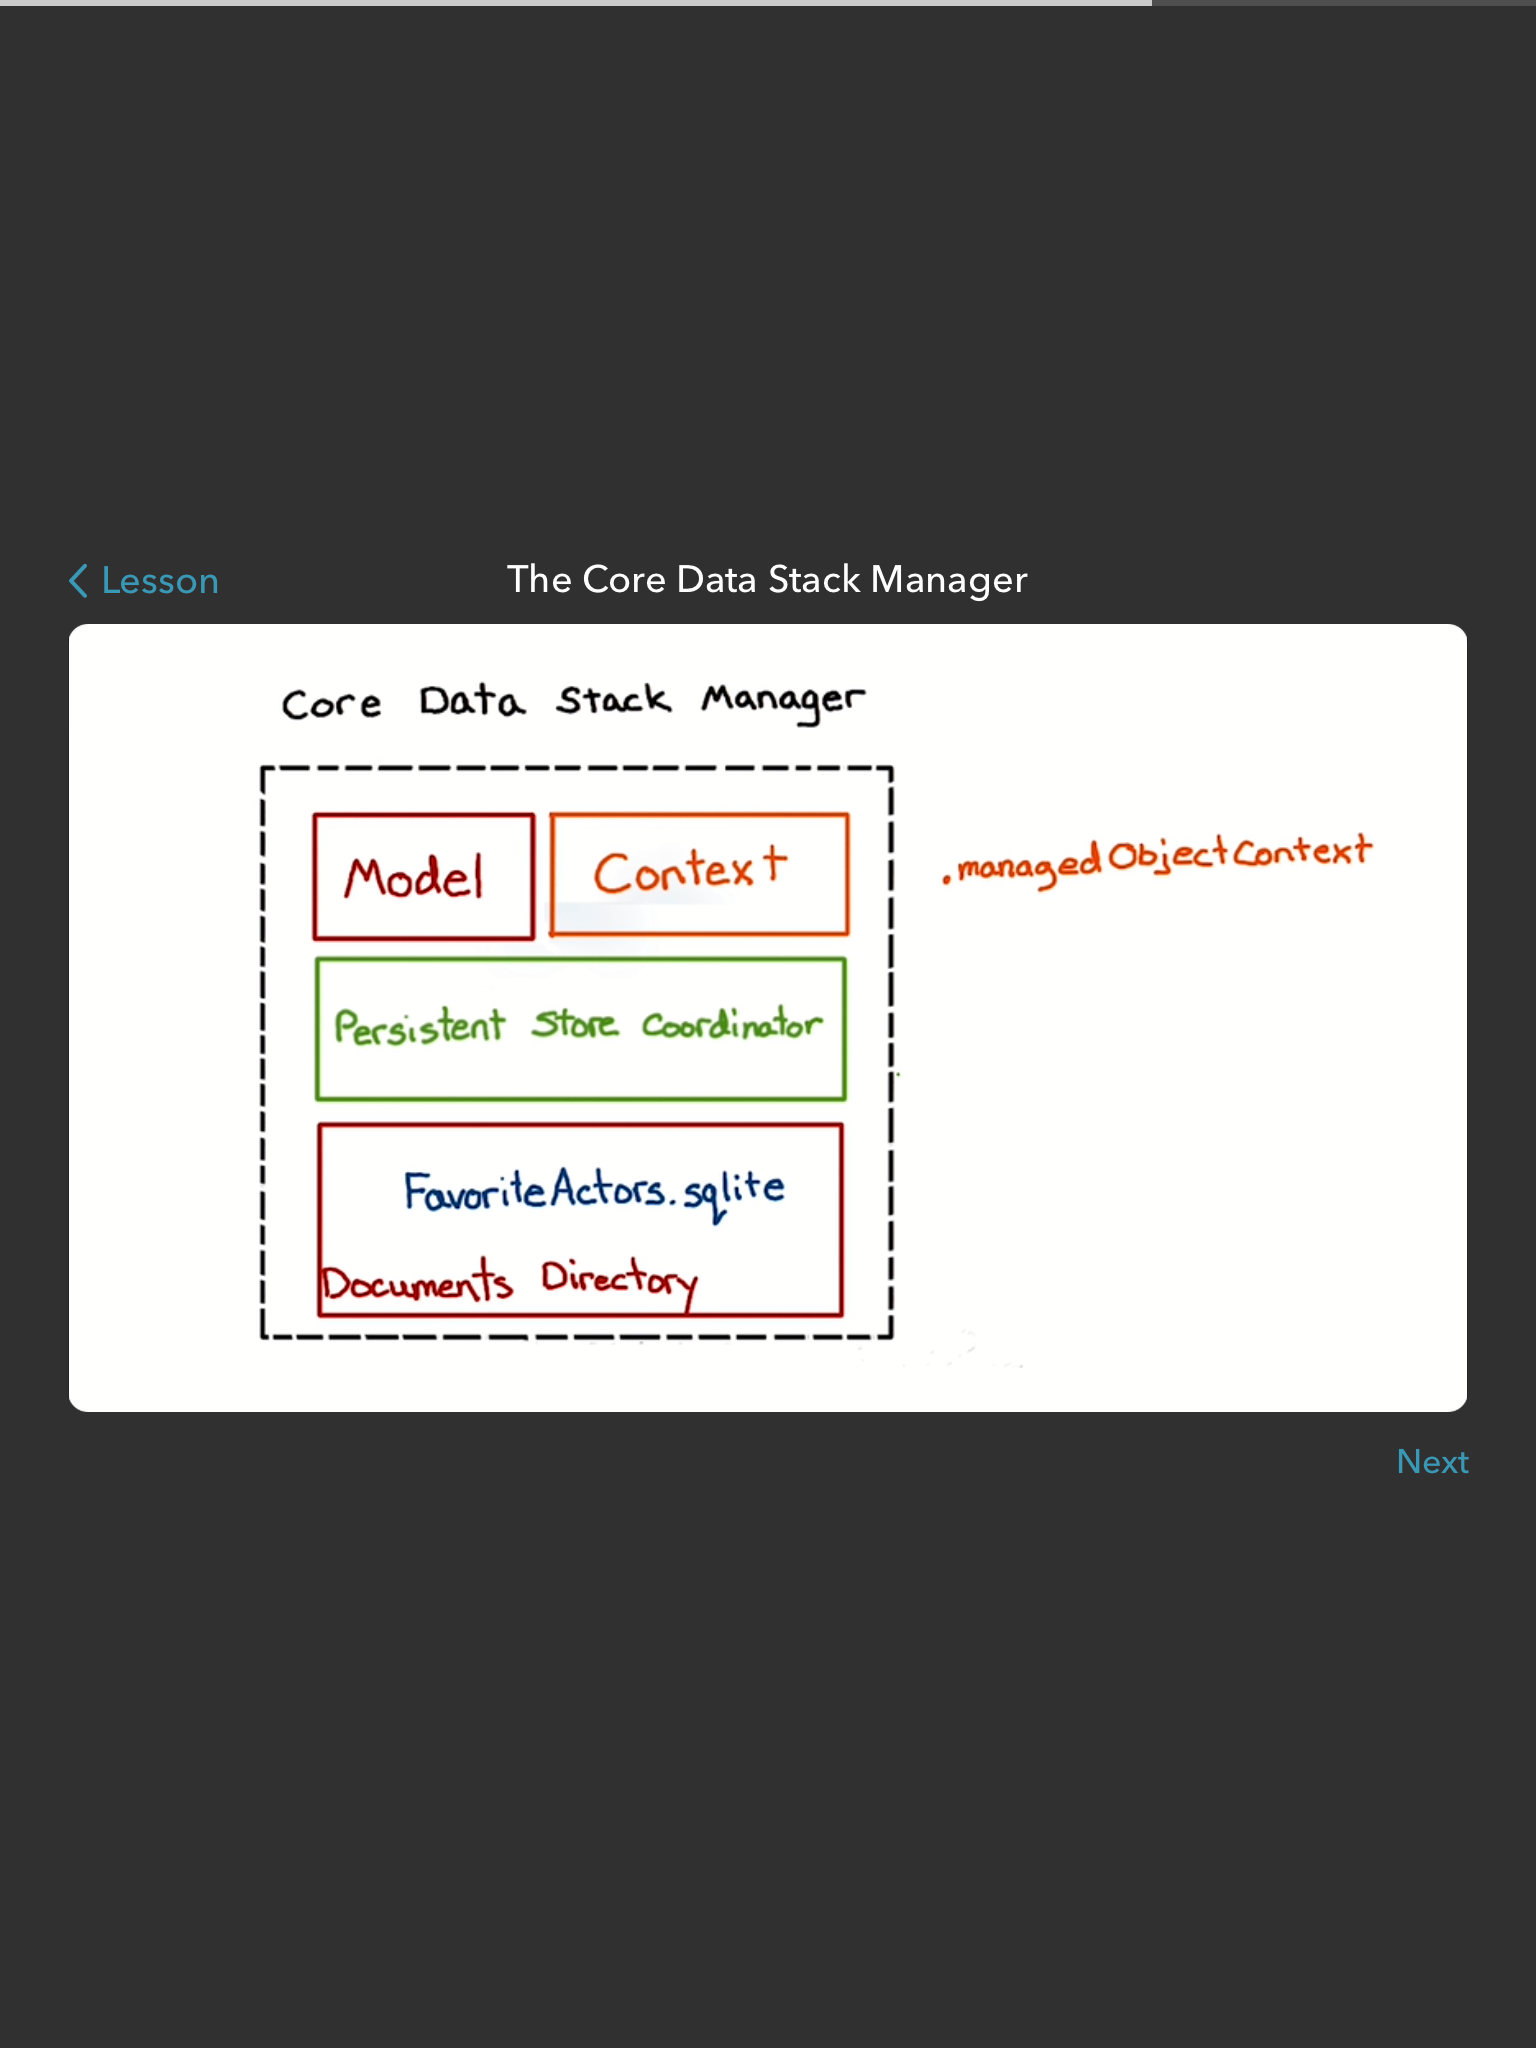
主要的有:
managedObjectModel:这个是用来读取Core Data Model(有着要保存的Object的信息,譬如关系或变量)
managedObjectContext:这跟Lesson 3中的Context是一样的
persistentStoreCoordinator:这个对象是用来帮组Context处理file 管理的,隐藏着与SQLite交互的底层操作。
弄好Core Data Stack接着加入Core Data Model
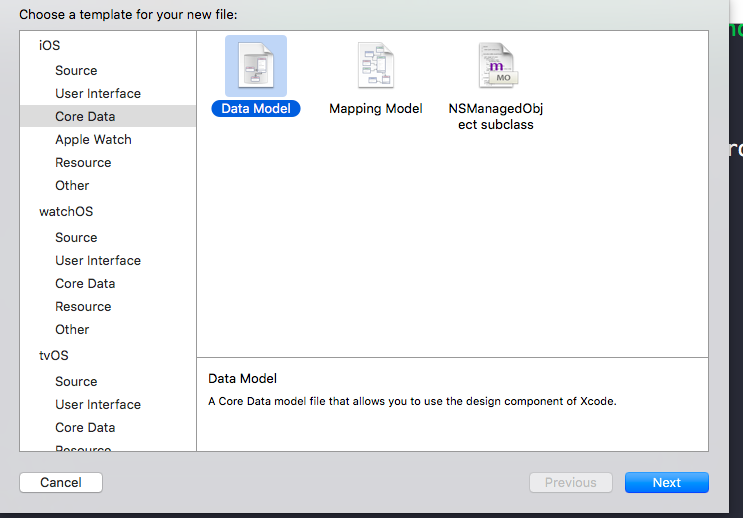
Core Data Model
新建file选Model,然后改个跟上面Core Data Stack里的managedObjectModel里的读取file同名就可以了。这里是Model。
那么究竟什么是Core Data Model呢?Core Data 是用来形容要保存的Object的。每一种我们想保存的Object的类型都叫Entity。而里面保存的私有值叫做attribute。
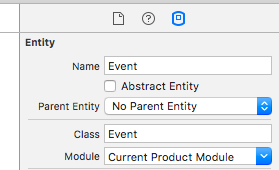
然后就开始,设置这个File了。假设我们有个类Event然后它有个私有值timeStamp。那么我们就在file里添加一个名为Event的Entity和一个timeStamp的attribute如图:

然后还设置Class和Module使其与相应的Class匹配,如图:
就这样设置完这个Core Data Model,接下来就是使Object为NSManagedObject的子类
使Object继承NSManagedObject
使要保存的Object成为NSManagedObject的子类,才能使Core Data 保存它们。
接下来,我们就示范如何将类Event变为NSManagedObject
五步:1.Import Core Data2.继承NSManagedObject3.将@NSManaged加到timeStamp properties/attributes前面4.覆盖超类并加入
init(entity: NSEntityDescription, insertIntoManagedObjectContext context: NSManagedObjectContext?)5.改写init接受context作为参数最后代码如下:
import Foundation
import CoreData
class Event :NSManagedObject{
    @NSManaged var timeStamp : NSDate
    override init(entity: NSEntityDescription, insertIntoManagedObjectContext context: NSManagedObjectContext?) {
        super.init(entity: entity, insertIntoManagedObjectContext: context)
    }
        init(context:NSManagedObjectContext){
            let entity = NSEntityDescription.entityForName("Event", inManagedObjectContext: context)!
            super.init(entity: entity, insertIntoManagedObjectContext: context)
            timeStamp = NSDate()
        }
}
完成了所有CoreData的配置,接着就是使用CoreData了。本章节是介绍如何配置CoreData供上一章节使用的。目的完成。
Core Data 进阶写法
Lazy Propertity
Lazy Propertity 就是在var或者let前加上lazy
lazy var a = 100 + 100
作用:这样的变量赋值是只会在使用的时候才计算的,那么这样就可以减少类初始化时间。