apk文件使用解压工具就能看到drawable等资源,但是有些游戏中的图片资源却是无法看到的。
这个问题探索了许久……
【1】图片资源不放置在drawable文件下,放在assets中(但是解压apk,同样能看到图片资源),以下说说使用方法。
分析:Ⅰ)当图片资源放在drawable中的时候,能有相应的Id去解析: BitmapFactory.decodeResource(res, id)
如果放置在assets下,就需要根据文件的名字去解析(Android提供AssetManager)。
Ⅱ)可以自己建立多层目录,方便管理。
Ⅲ)这样的解析过程,耗费的时间要比根据Id解析要多(手机越来越智能,这点时间基本看不出来)。
代码:
 /**
     * 从Assets中读取图片
     * @param fileName :assets根目录下 "a.png",有子文件夹的 "abc/a.png"
     * @return
     */
      public static Bitmap getImageFromAssets(Context context, String fileName)
      {
          Bitmap image = null;
          AssetManager am = context.getResources().getAssets();
          try
          {
              InputStream is = am.open(fileName);
              image = BitmapFactory.decodeStream(is);
              is.close();
          }
          catch (IOException e)
          {
              e.printStackTrace();
          }
          return image;
      }
【2】图片资源打包在jar下,然后导入工程(但是解压apk,同样能看到图片资源)
分析:使用过一下第三方的jar包,在apk解压后是看不到的,尝试看看。最终发现jar包中的assets文件在apk中可见了。
Step1:打包jar
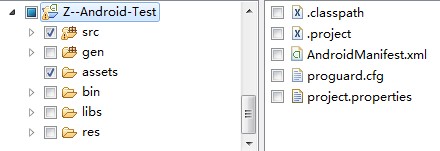
工程->右键->Export->Java/jar file->选择需要打包的src 和 assets(如下图)
Step2:解读assets中的图片,同【1】
Step3:打包apk,然后发现jar包中的assets和当前工程的assets合并了!
【3】图片资源加密,然后在assets文件下读取(可以实现资源保护,但是貌似比较耗时)
分析:通过某种方式对图片预先加密,然后在Android程序中解密,在转换成Bitmap。
可能别的应用程序就是这样做的吧,哪位大神有妙招,给介绍一下吧!(下面介绍一下简单方法)
Step1:加密,采用文件流方式,读取资源,然后修改,最后生成文件(随便格式都可以,就不能知道是图片了)
Ⅰ)每隔多少个字节添加一个指定的字节
Ⅱ)每隔多少个字节,交换字节(代码示例)
 public class KMD1 {
    public static void encrypt(String filePath){
           byte[] tempbytes = new byte[5000];
           try {
            InputStream in = new FileInputStream(filePath);
            OutputStream out = new FileOutputStream(filePath.subSequence(0, filePath.lastIndexOf("."))+"2.jpg")
            while (in.read(tempbytes) != -1) {//简单的交换
                byte a = tempbytes[0];
                tempbytes[0] = tempbytes[1];
                tempbytes[1] = a;
                out.write(tempbytes);//写文件
            }
        } catch (IOException e) {
            e.printStackTrace();
        }
    }
    public static void main(String[] args){
        KMD1.encrypt("D:/a.jpg");
    }
}
- Step2:解密,与加密过程反向即可。
       /**
* 从Assets中读取图片
* @param fileName
* @return
*/
 public static Bitmap getImageFromAssets(Context context, String fileName)
 {
     Bitmap image = null;
     AssetManager am = context.getResources().getAssets();
     try
     {
         InputStream is = am.open(fileName);
         byte[] buffer = new byte[1000000];//足够大
         is.read(buffer);
         for(int i=0; i<buffer.length; i+= 5000){//与加密相同
          byte temp = buffer[i];
          buffer[i] = buffer[i+1];
          buffer[i+1] = temp;
         }
         image = BitmapFactory.decodeByteArray(buffer, 0, buffer.length);
         is.close();
     }
     catch (IOException e)
     {
         e.printStackTrace();
     }
     return image;
 }
【3】使用setPixel()和getPixel()对每个像素点进行加密,然后在使用的时候在还原
分析:通过Bitmap.getPixel(x, y)得到color值,对color的rgb值加密操作,然后setPixel(x,y,color)
Step1:懒得写了,直接贴代码:
注意:bitmap一定要copy一份,然后第二个值为true才能对其setPixel,不然会报错的;代码中的encrypt和decrypt就是你加密解密过程;
严重问题:对bitmap setPixel然后在getPixel,color值竟然不是set的值,有偏差,不知道为什么。有能解决这个问题的,请留言一下。
 Bitmap temp_bitmap = image.copy(Bitmap.Config.ARGB_8888, true);
            int width = temp_bitmap.getWidth();
            int height = temp_bitmap.getHeight();
            int[] pixels = new int[width * height];
            //temp_bitmap.getPixels(pixels, 0, width, 0, 0, width, height);
            for(int i = 0; i < height; i++)
            {
                for(int j = 0; j < width; j++)
                {
                    int color = temp_bitmap.getPixel(i, j);
                    int r = Color.red(color);
                    int g = Color.green(color);
                    int b = Color.blue(color);
                    int alpha = Color.alpha(color);
                    //if(alpha != 0)
                    {
                        r = encrptyRGB(r, 2*(i*j));
                        g = encrptyRGB(g, 4*(i*j));
                        b = encrptyRGB(b, 6*(i*j));
                        color = Color.argb(alpha, r, g, b);
                        pixels[width * i + j] = color;
                        //temp_bitmap.setPixel(i, j, color);
                    }
                }
            }
            temp_bitmap.setPixels(pixels, 0, width, 0, 0, width, height);
            for(int i = 0; i < height; i++)
            {
                for(int j = 0; j < width; j++)
                {
                    int color = temp_bitmap.getPixel(i, j);
                    int r = Color.red(color);
                    int g = Color.green(color);
                    int b = Color.blue(color);
                    int alpha = Color.alpha(color);
                    //if(alpha != 0)
                    {
                        r = decryptRGB(r, 2*(i*j));
                        g = decryptRGB(g, 4*(i*j));
                        b = decryptRGB(b, 6*(i*j));
                        color = Color.argb(alpha, r, g, b);
                        pixels[width * i + j] = color;
                        //temp_bitmap.setPixel(i, j, color);
                    }
                }
            }
            temp_bitmap.setPixels(pixels, 0, width, 0, 0, width, height);
            return temp_bitmap;